Add and manage locations
Give each place you work from its own name, phone, towns and lead email. The Locations page shows only on accounts with plan levels.
If you work from more than one place, each can have its own name, phone, towns and lead email. Your main location is whatever you set in Settings.
The Locations link appears in the top menu only on accounts with plan levels. If you do not see it, there is nothing to set up.
Steps
- Select Locations in the top menu.
- Check the table. The first row is your main location, tagged Main.
- Under Add a location, type a Name and a Phone. Homeowners see the name in the designer.
- Optional: type Towns served with commas between them. The town box in the designer suggests these.
- Optional: type a Lead email. Leads from this location go there. Empty means your usual lead emails.
- Press Add the location.
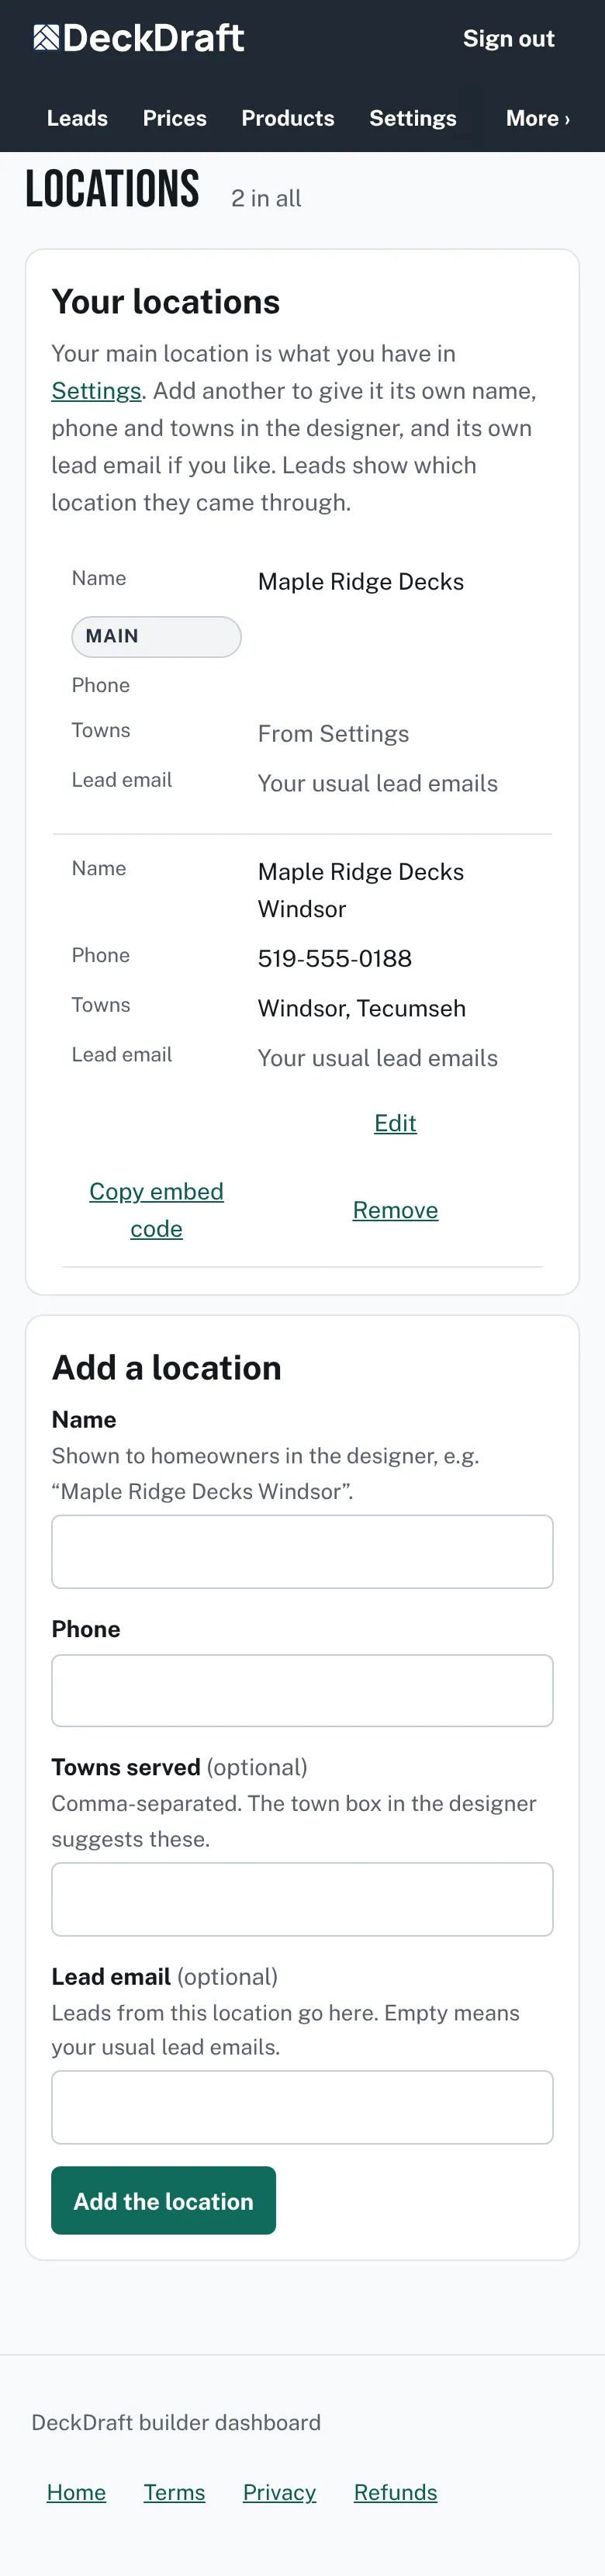
The Locations page with a table showing the main location and one extra location, plus an Add a location form with name, phone, towns and lead email boxes. - In the row, press Copy embed code to copy the deck and fence codes for that location.

Edit or remove
- Press Edit in the row, change the boxes, then press Save.
- Press Remove and confirm. Past leads stay in your list. Embed codes for it then show your main location.
Good to know
- Only the account owner can add, edit or remove locations. Members can look.
- Leads show which location they came through. The Leads page gets a Location filter once you have an extra one.
- If your plan has a limit, the heading shows how many are used. A note appears when all are in use.
- The lead email box stays off until your email address is confirmed.
- See who can do what: Owner and member access.
Checked against the product on 2026-11-19.