Gates and posts in the fence designer
How a homeowner adds a walk, double or driveway gate, turns it round and says what it is for, and where the post count shows.
The Gates step is the third step. The homeowner picks a gate, then taps the fence where it goes. No gate needed? They just tap Next.
Steps
- Pick a card: Walk gate, Double gate or Driveway gate. Each card offers two widths, shown as buttons such as 4′ wide and 5′ wide.
- Tap the fence where the gate goes. It shows as an orange label with a swing arc, for example 4′ GATE.
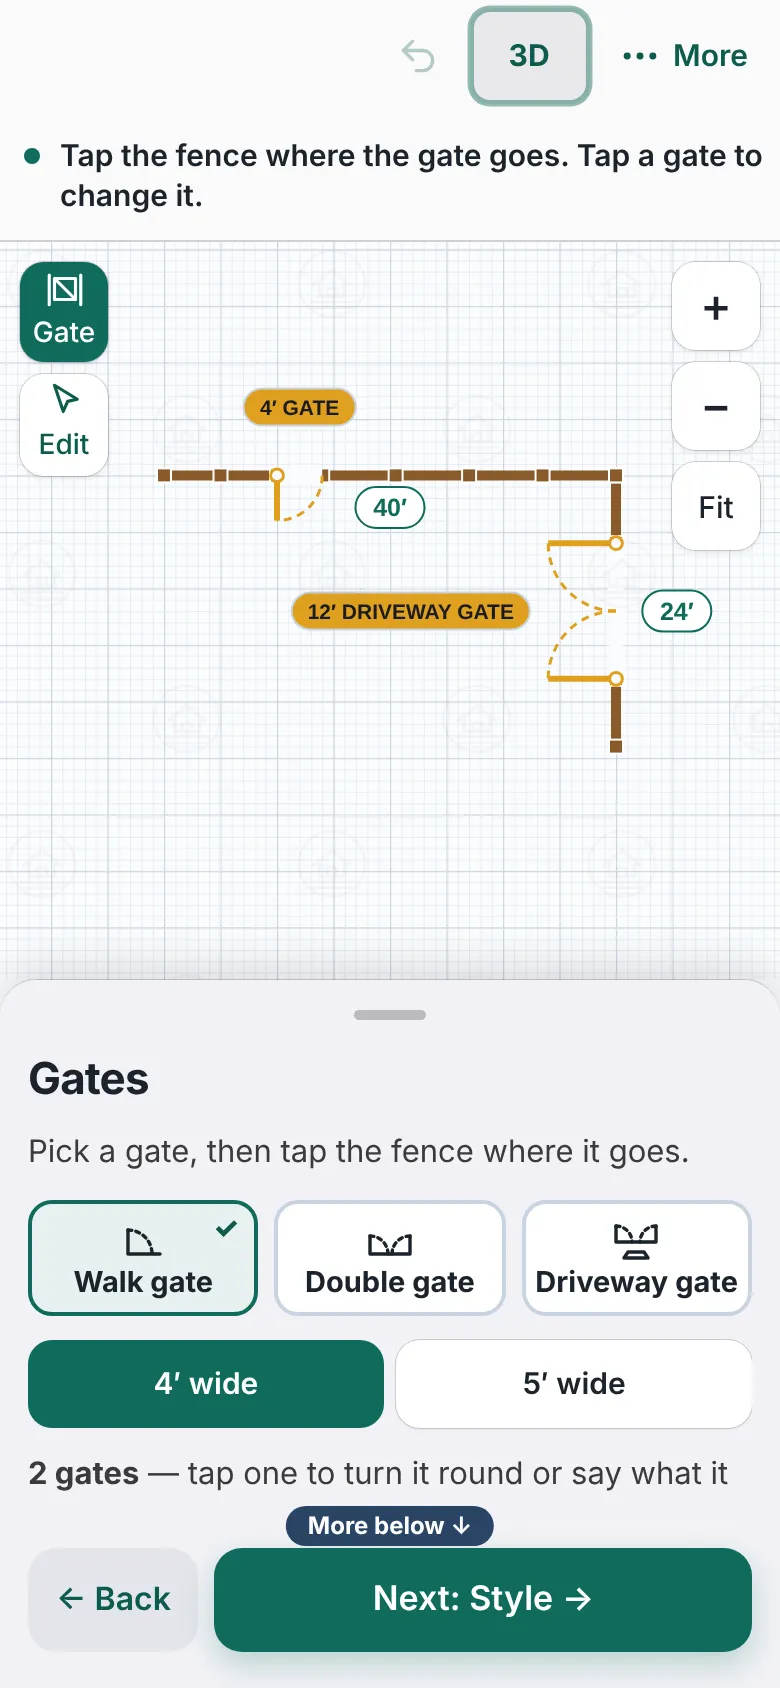
The Gates step with a 4 foot walk gate and a 12 foot driveway gate drawn on the fence, and three gate cards in the panel. - Tap the gate, or pick it from Pick a gate to change it. Use Slide back and Slide on to move it along the fence.
- Under Hinge at, choose The start or The end. This is for single gates only, so a double gate does not show it.
- Under Opens to the, choose Right or Left. Start, right and left are as you walk the fence from where you began drawing it.
- Under What it is for (optional), choose Not set, Garden, Driveway or Pool. Tick Self-closing if it applies.
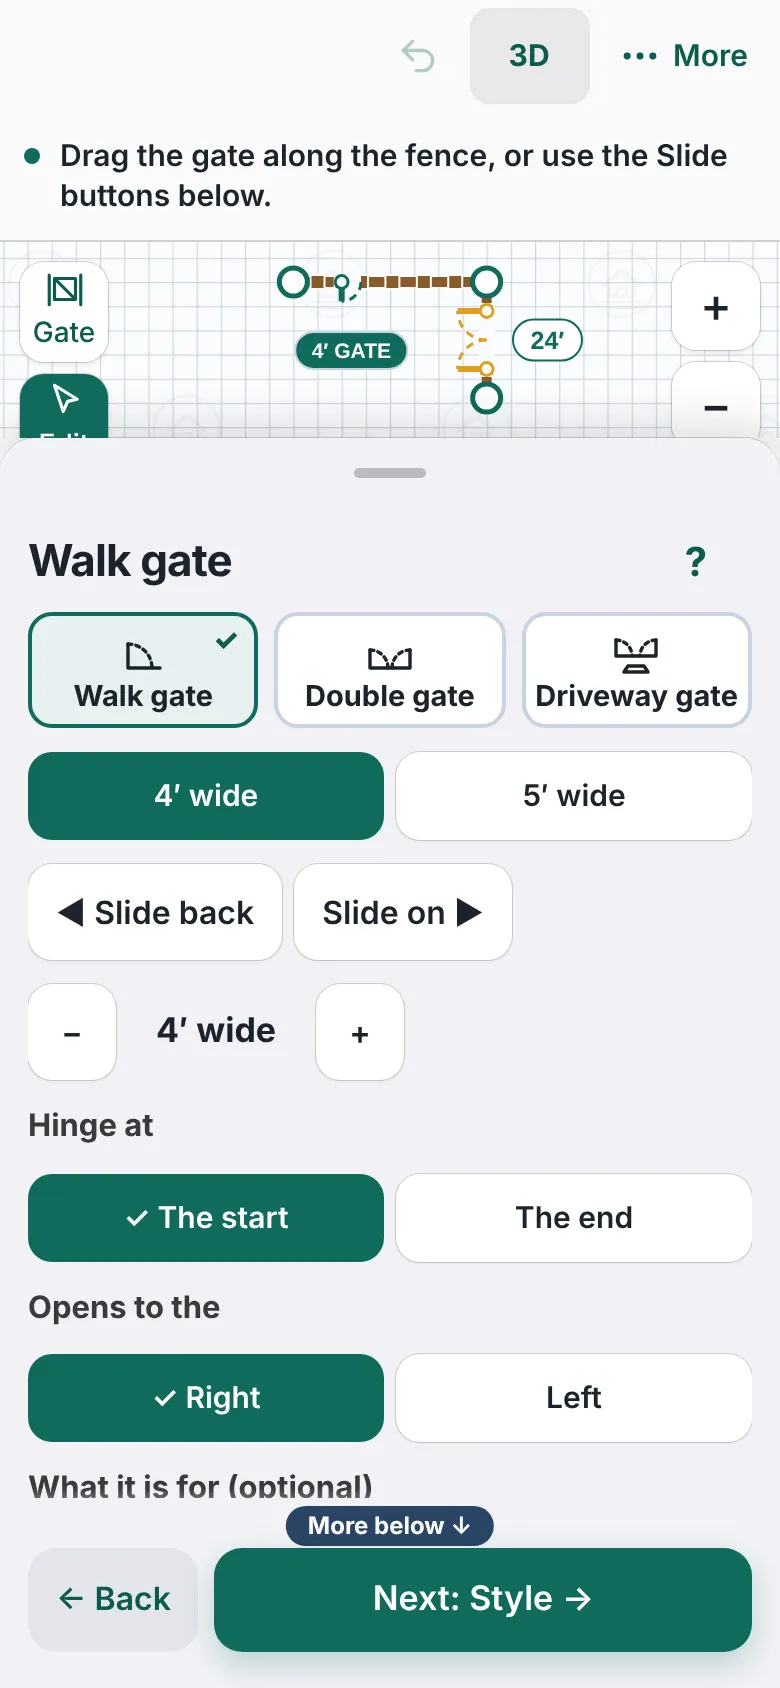
A picked walk gate with its panel showing Slide back, Slide on, Hinge at, Opens to the and What it is for. - Tap Done, or Remove gate to take it out.


Posts
- A homeowner does not place posts. The designer counts them: the totals bar under the drawing reads like 64′ total · 1 gate · 11 posts.
- Look it over lists Posts as an approximate number, with the spacing, and says it is confirmed on site.
- To add a gate to a chosen side, pick the side in the list, then tap Add a gate here.
- Next: Style, review and send.
Checked against the product on 2026-11-19.