Privacy screens
Add a privacy screen on the Boards and railing step, pick its style, height and color, and choose what happens to the railing behind it.
A privacy screen is a panel along one side of the deck. It is in the optional section of the Boards & railing step.
Steps
- On Boards & railing, press Skirting, privacy screen and extras, then Privacy screen.
- Optional: pick a Style first: Horizontal slats, Upright slats, Solid boards, Cut-pattern panel, Louvers or Lattice.
- Pick a Height: 4 ft, 5 ft or 6 ft. Pick a Color: Cedar, Brown, Gray, Black or White.
- Press Add a screen. It goes on a side and shows on the drawing, with a label such as SLATS 6′.
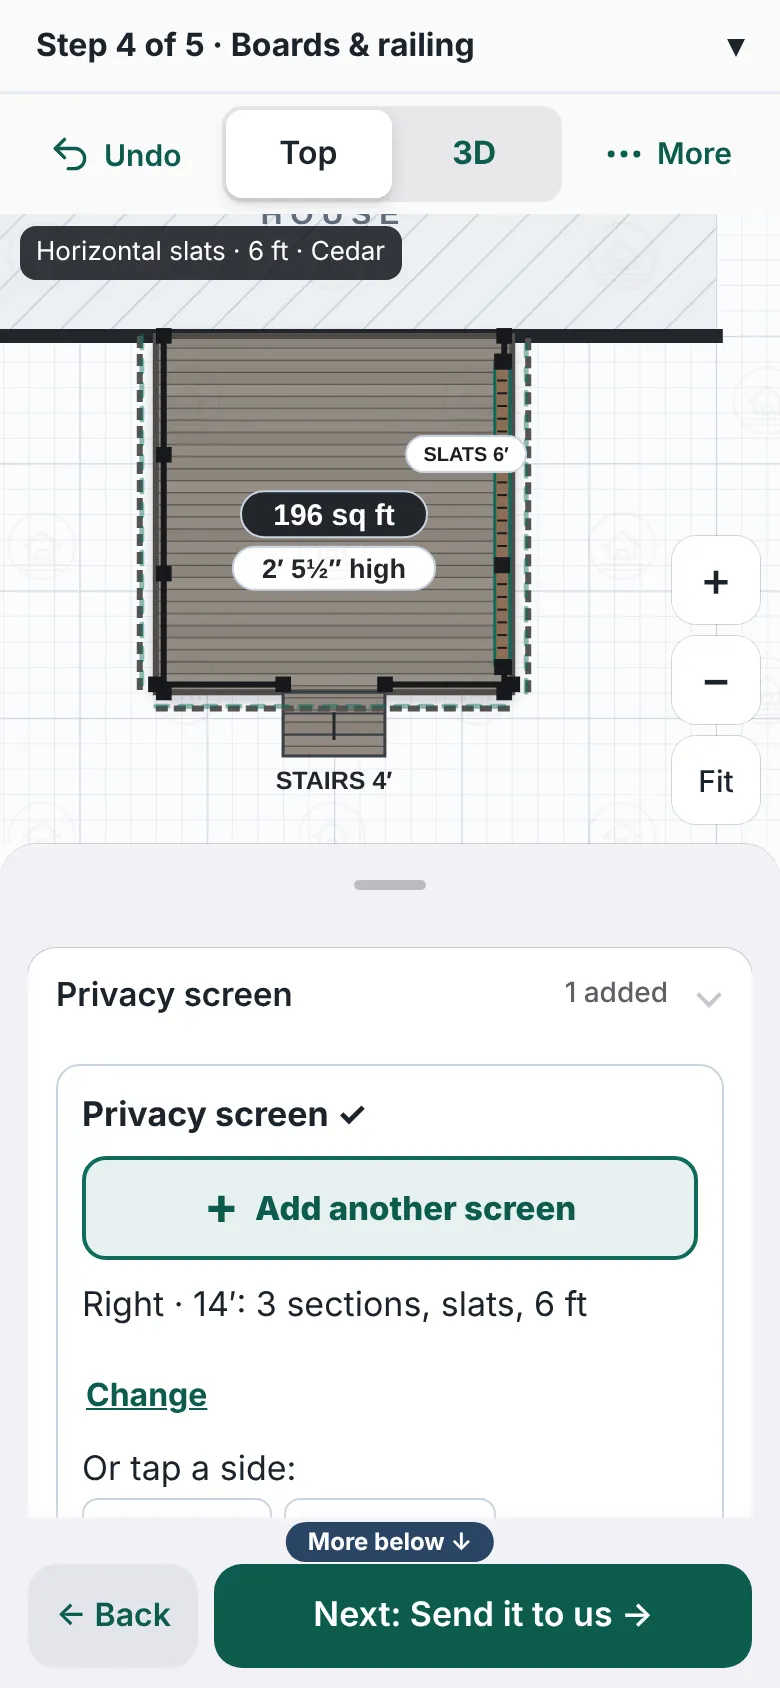
The Privacy screen box with one screen added. It shows Add another screen, a line saying Right 14 feet with 3 sections, slats and 6 ft, a Change link, and buttons to pick the Left, Front or Right side. - To use another side, press Left, Front or Right under Or click the side it goes on.
- Press Change beside a screen to edit it. Press Add another screen for more.
- On a raised deck, choose Screen replaces the railing on this side or Keep the railing in front of the screen.
- Optional: press Put it on the ground beside the deck instead.

Good to know
- Left and right are as seen from the yard, facing the house.
- The box heading says how many you added, for example 1 added.
- A screen needs a straight side. A curved side cannot hold one: Curved edges.
- A screen cannot sit on a bench stretch: Benches.
- On a computer, the Layers button has a Privacy screens tick. It chooses what the drawing shows.
- Railing choices are on Railing on the deck.
- Back: Boards and deck look.
Checked against the product on 2026-11-19.